When I first helped a client transform a cramped bachelor pad into a sleek entertainment hub, the biggest hurdle wasn’t the TV size—it was the wall behind it. A blank slab can make even the most expensive screen feel out of place, while a thoughtfully styled backdrop turns a simple viewing area into a conversation starter. That’s why gathering the right TV wall decor ideas and designs is essential: you’re not just covering a wall, you’re setting the tone for the whole room.
In This Article
- 1. Floating Media Console with Integrated Storage
- 2. Gallery Wall with Mixed Media Art
- 3. Textured Accent Wall with Wood Paneling
- 4. Integrated LED Backlighting (Bias Lighting)
- 5. Statement Shelf with Decorative Objects
- 6. Mirror Panel for Light Amplification
- 7. Minimalist Paint Accent with Geometric Stencil
- Comparison of Top Picks
- Putting It All Together: A Sample Room Layout
- Maintenance Tips for Longevity
- Related Inspiration
- Final Verdict
This list pulls together the most practical, budget‑friendly, and high‑impact solutions I’ve tested on real homes over the past decade. From floating shelves that double as storage to gallery‑style art arrangements, each idea includes costs, dimensions, and a quick “how‑to” so you can start planning today.
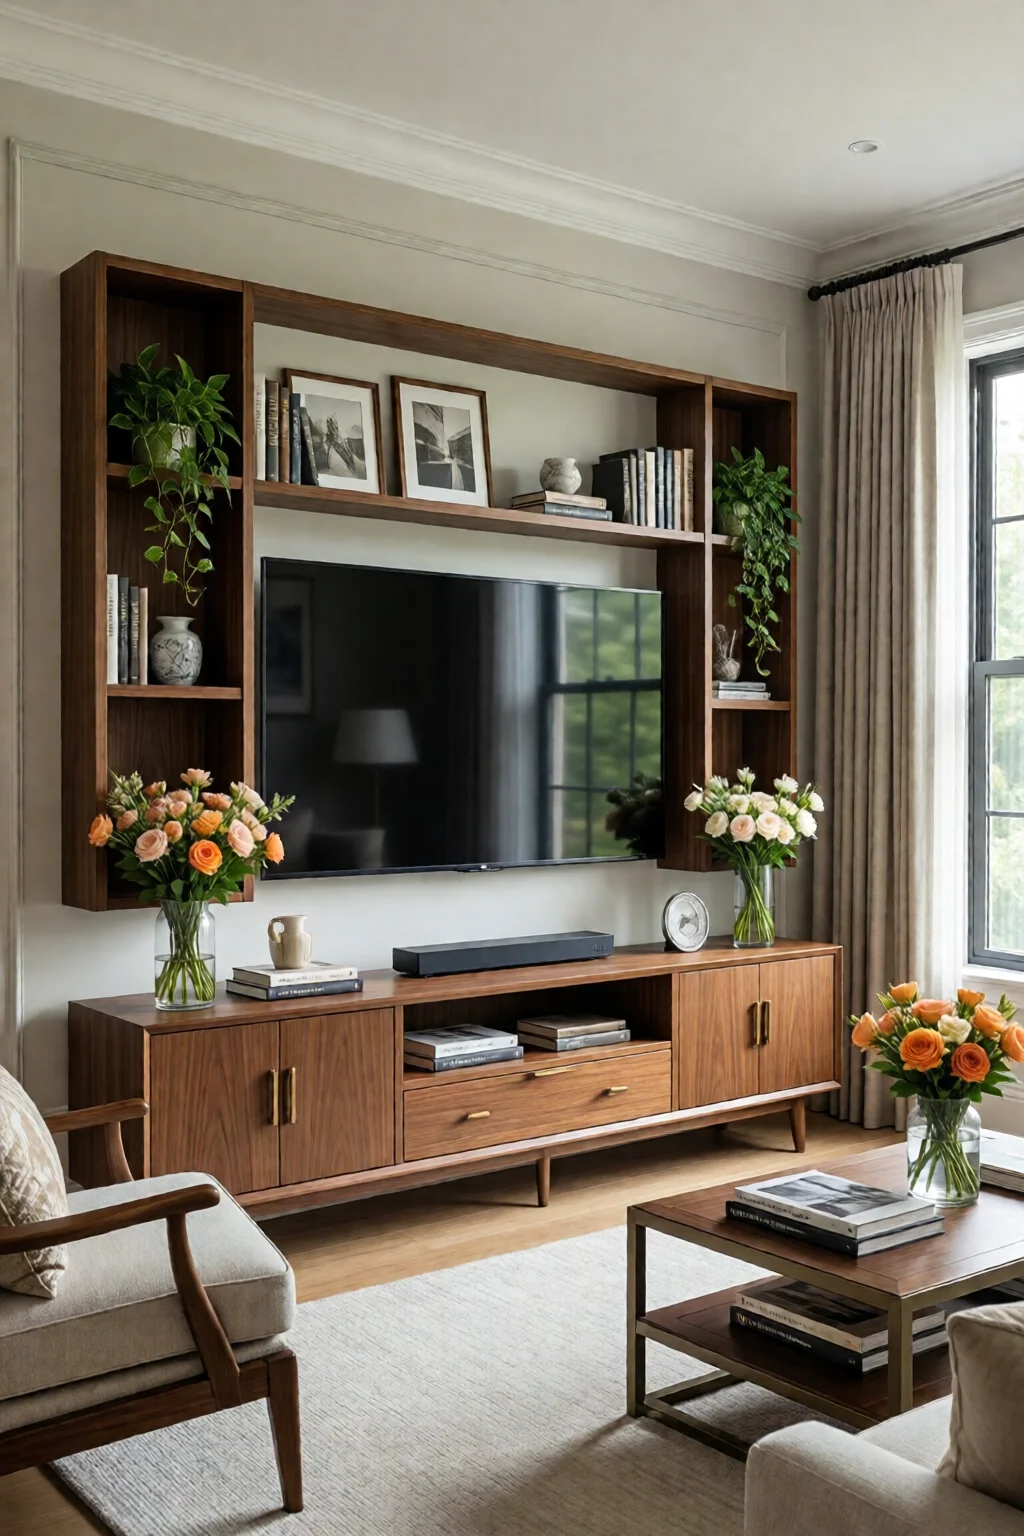
1. Floating Media Console with Integrated Storage
Modern floating consoles keep the floor clear, making the room feel larger while providing a discreet place for cables, gaming consoles, and décor. I recommend the West Elm Industrial Media Console—a 48‑inch wide, 18‑inch deep unit priced at $399. It comes pre‑finished in matte black, supports up to 150 lb, and includes hidden cable management.
How to install: Measure the TV’s width and add 6‑12 inches on each side for balance. Use a stud finder to locate wall studs, then mount the console with the included hardware (four 2‑in. lag bolts). Add a 2‑in. beadboard trim below for a finished look.
Pros:
- Creates a sleek, modern look
- Provides concealed storage for peripherals
- Easy DIY installation (under 2 hours)
Cons:
- Higher upfront cost compared to DIY plywood
- Limited color options without custom paint
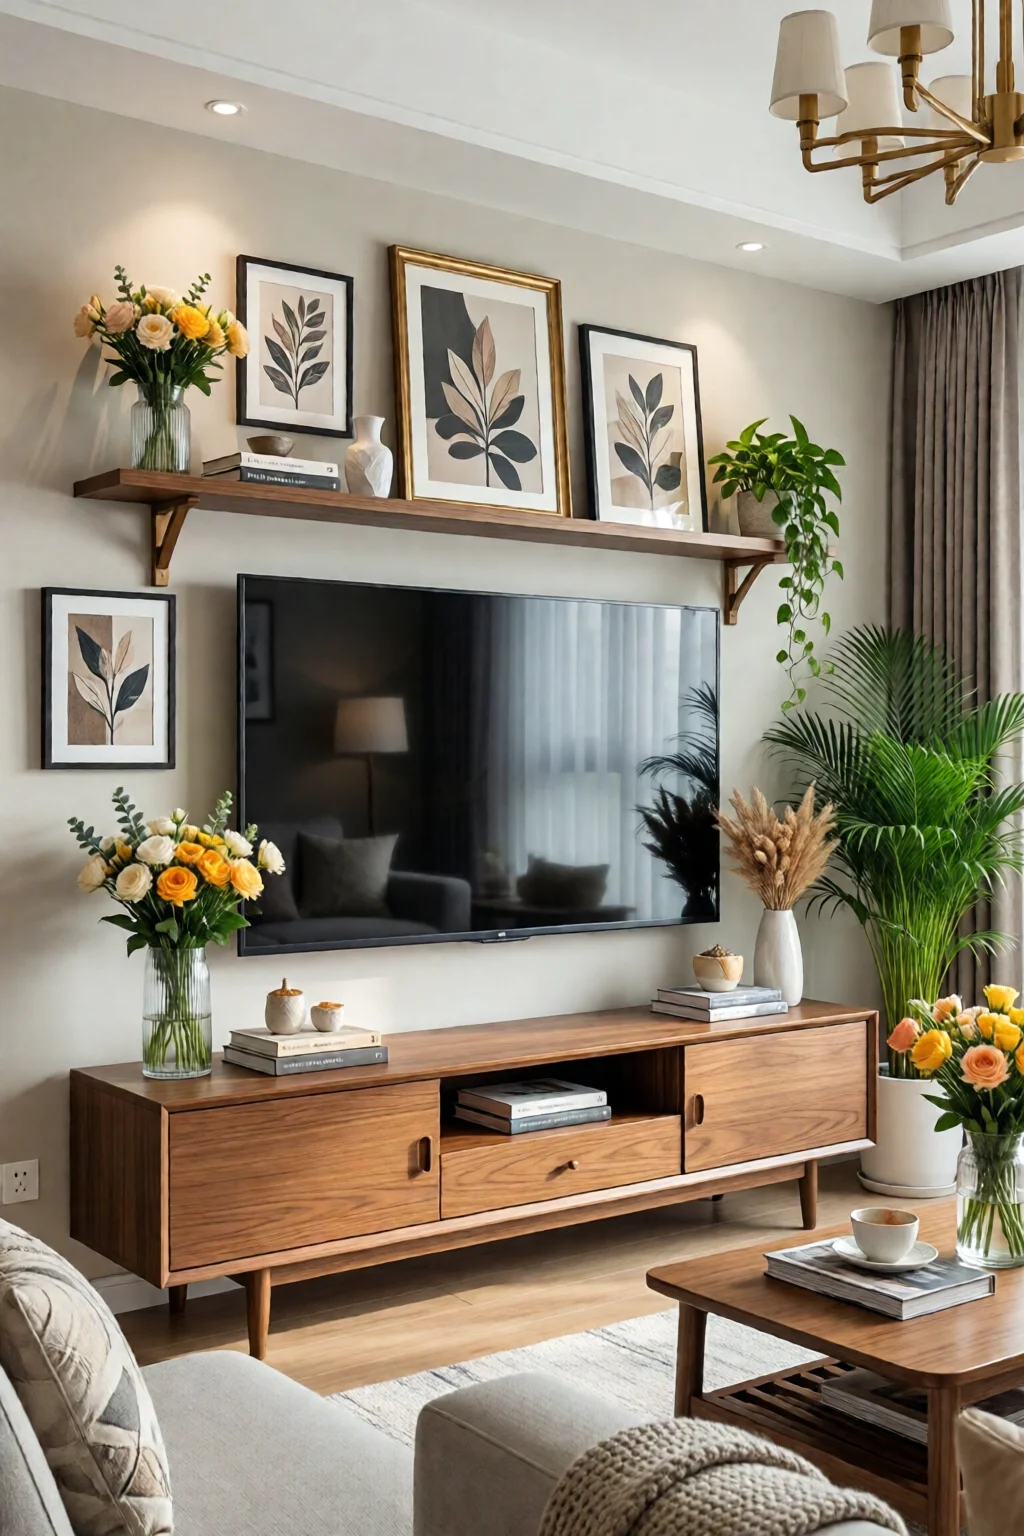
2. Gallery Wall with Mixed Media Art
A gallery wall adds personality without overwhelming the TV. Choose three to five frames ranging from 8 × 10 in. to 24 × 36 in. I often source frames from IKEA RIBBA ($19.99 for a 13 × 19 in. frame) and mix them with a few high‑end pieces from Pottery Barn ($79‑$149 each). Keep the total width between 60‑70 % of the TV’s width to maintain visual hierarchy.
Steps:
- Lay out the frames on the floor; start with the largest in the center.
- Use a level and painter’s tape to mark the top and side alignments.
- Secure each frame with 1‑in. picture hooks; spacing should be 2‑3 in. apart.
Tips: Include a mix of prints, personal photos, and a small sculptural piece (e.g., a metal wall art from CB2 at $129) for texture.
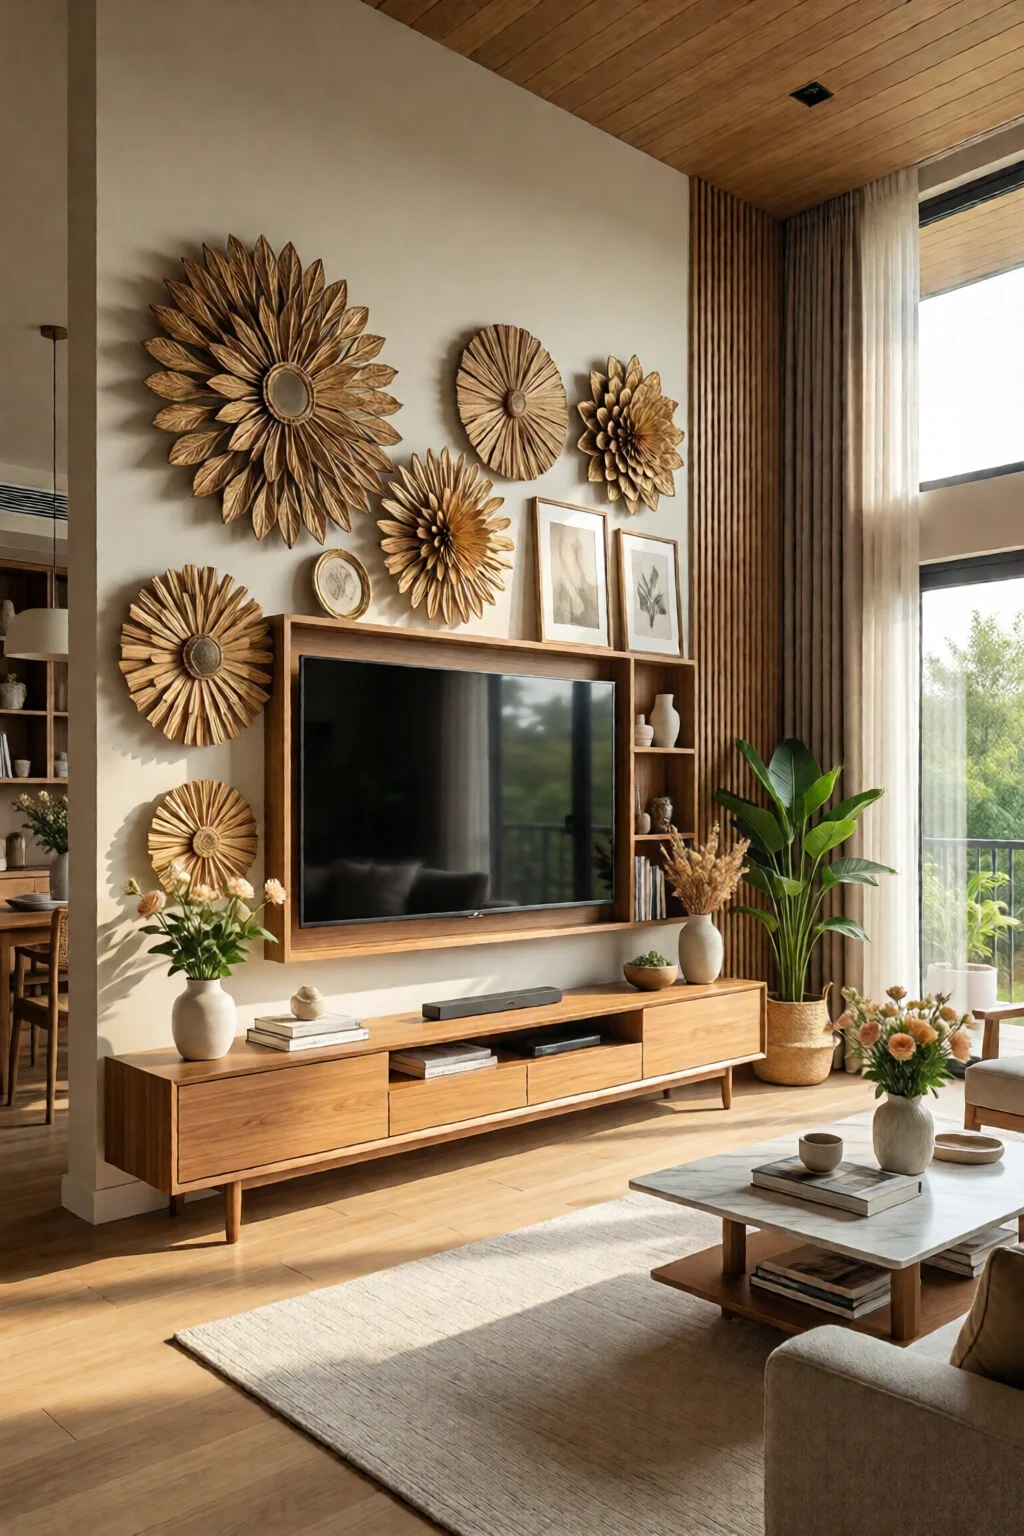
3. Textured Accent Wall with Wood Paneling
Wood paneling adds warmth and depth—perfect for a living‑room that leans toward a cozy, cabin vibe. My go‑to product is Reclaimed Wood Paneling from Home Depot (12‑in. × 12‑in. panels, $4.97 each). For a 120‑sq‑ft wall, you’ll need roughly 100 panels, costing about $495 plus installation.
Installation guide:
- Prep the wall: remove any old wallpaper and apply a thin coat of primer.
- Start at the bottom center; use a nail gun with 1‑in. finish nails.
- Stagger panels for a natural look—like brickwork.
- Seal with a clear matte polyurethane ($30 per quart) to protect against humidity.
Pros: Sustainable material, DIY‑friendly, adds instant character.
Cons: Requires more time (2‑3 days for a DIY crew) and precise cutting.
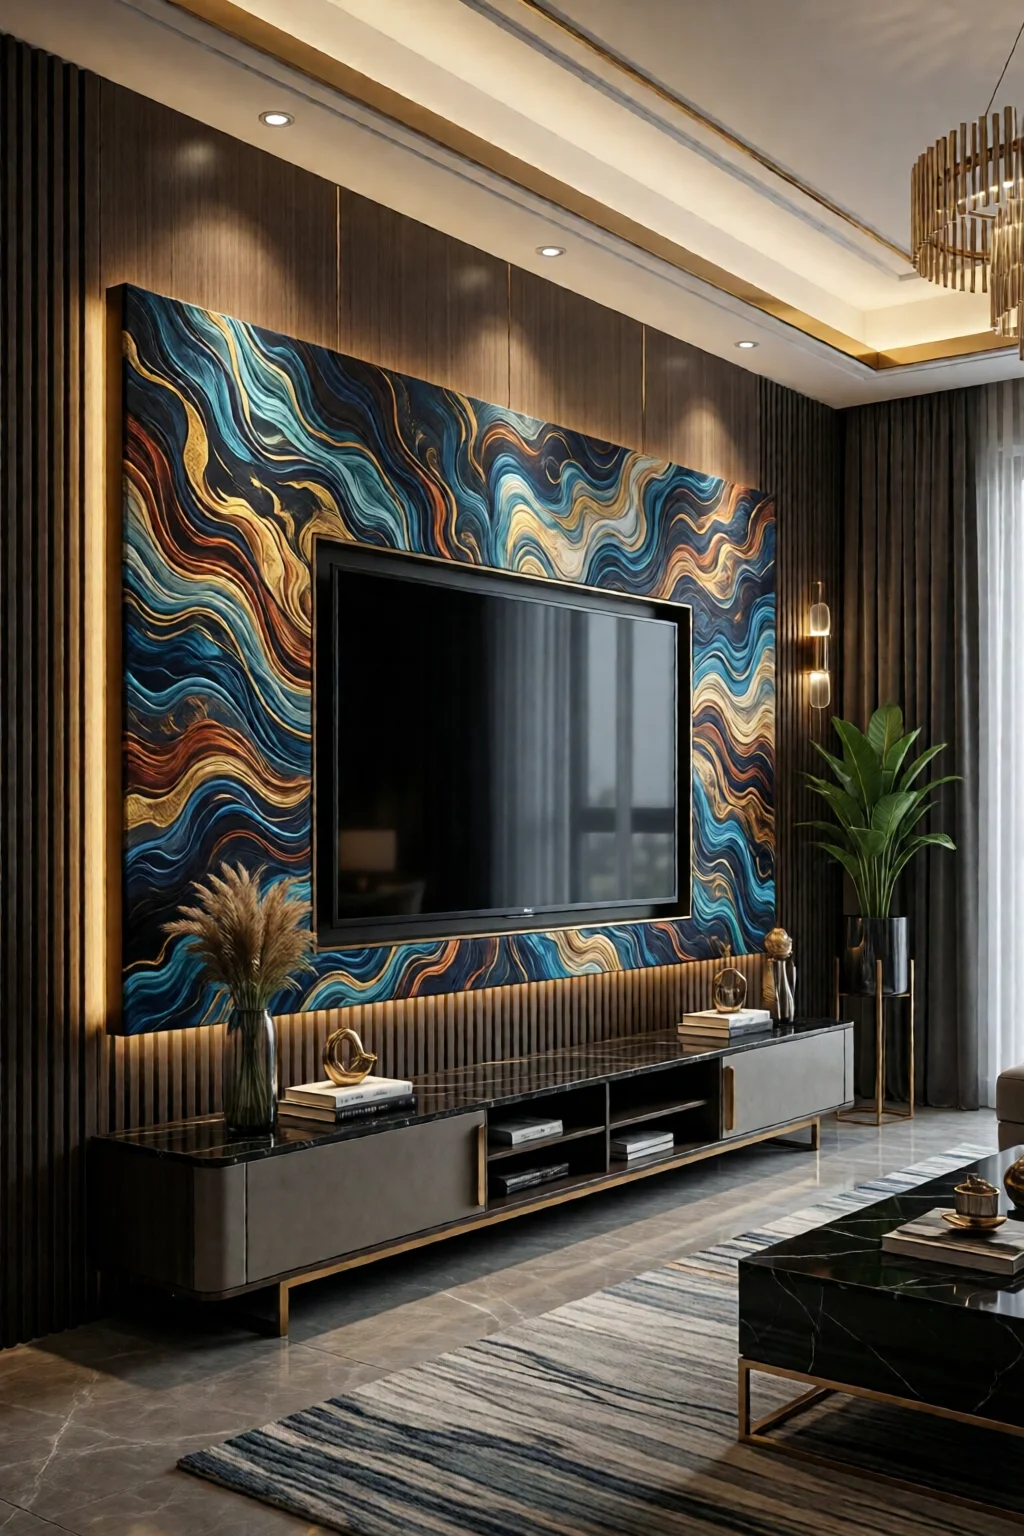
4. Integrated LED Backlighting (Bias Lighting)
Bias lighting reduces eye strain and makes colors pop. A budget-friendly option is the Philips Hue Play Gradient Lightstrip (5‑meter kit, $199). It sticks directly behind the TV and syncs with on‑screen content via the Hue app.
Installation steps:
- Clean the back of the TV and the wall area.
- Peel the adhesive backing and apply the strip, ensuring even coverage.
- Connect to a power source and pair with your Hue Bridge.
- Adjust brightness to 10‑15 % of TV luminance for optimal effect.
Pros:
- Enhances viewing experience
- Energy‑efficient (LED, <1 W per foot)
- Can be controlled via voice assistants
Cons:
- Initial cost higher than basic LED strips
- Requires a Hue Bridge ($69) for full functionality
5. Statement Shelf with Decorative Objects
A single, wide shelf can serve as both a display platform and a storage solution. I love the CB2 Skyline Wall Shelf (72 × 12 × 2 in., $149). Pair it with a few curated items: a Sonos Beam Soundbar ($449), a small potted succulents ($25 each), and a vintage record player (Audio-Technica AT-LP120XUSB, $299).
Placement tips:
- Mount the shelf at eye level (approximately 57 in. from the floor) for easy viewing.
- Leave 2‑3 in. of space between the TV and shelf to avoid visual clutter.
- Use decorative trays (e.g., West Elm Boxed Tray, $69) to group small items.
Pros:
- Shows personality without overwhelming the TV
- Provides practical storage
- Easy to update seasonally
Cons:
- Requires careful weight distribution
- Can become a “catch‑all” if not curated
6. Mirror Panel for Light Amplification
Mirrored panels reflect ambient light, making a small living room feel larger. A 48‑in. × 48‑in. mirrored tile from Lowe’s costs $89. Install it directly above the TV, leaving a 2‑in. gap for ventilation.
Installation quick‑tips:
- Measure and cut the tile to fit (use a glass cutter).
- Secure with mirror mounting clips (included).
- Seal edges with clear silicone to prevent moisture.
Pros:
- Boosts natural light
- Adds a luxe feel without high cost
- Easy to clean
Cons:
- May create glare on the screen if angled poorly
- Requires careful handling during installation
7. Minimalist Paint Accent with Geometric Stencil
For a low‑budget yet high‑impact look, use a geometric stencil. I recommend a WallPops Hexagon Stencil Kit ($24) and a premium matte paint like Benjamin Moore Aura in “Hale Navy” ($65 per gallon). Paint a 4‑ft tall, 8‑ft wide band behind the TV.
Steps:
- Mark the band dimensions with painter’s tape.
- Apply a base coat (e.g., light gray) and let dry 2 hours.
- Place the stencil, secure with painter’s tape, and roll on the accent color.
- Remove stencil while paint is still tacky for crisp edges.
Pros:
- Cost‑effective (total under $120)
- Customizable to any pattern or color
- Easy DIY in a weekend
Cons:
- Requires steady hand for clean lines
- Paint may need touch‑ups over time

Comparison of Top Picks
| Idea | Average Cost (USD) | Installation Time | Skill Level | Impact Score (1‑10) |
|---|---|---|---|---|
| Floating Media Console | $399‑$599 | 1‑2 hrs | Easy | 8 |
| Gallery Wall | $150‑$300 | 2‑3 hrs | Easy‑Medium | 7 |
| Wood Panel Accent | $500‑$650 | 2‑3 days | Medium | 9 |
| LED Backlighting | $268 (incl. Hue Bridge) | 30 min | Easy | 8 |
| Statement Shelf | $250‑$400 | 1‑2 hrs | Easy | 7 |
| Mirror Panel | $89‑$120 | 1‑2 hrs | Medium | 6 |
| Paint Accent with Stencil | $110‑$150 | 4‑6 hrs | Easy | 7 |
Putting It All Together: A Sample Room Layout
Imagine a 12‑ft wide living room with a 65‑in. 4K TV centered on the main wall. I’d start with the floating media console (Idea 1) to hide cables, add a narrow geometric paint stripe (Idea 7) behind the TV for visual depth, and top it off with a subtle LED backlight (Idea 4). On either side of the TV, place two slim floating shelves (similar to Idea 5) to hold a Sonos Beam and decorative objects. Finish with a small gallery of framed black‑and‑white photography (Idea 2) at eye level. This layered approach creates a balanced, functional, and stylish focal point.
If you love the look of natural wood, swap the paint stripe for reclaimed paneling (Idea 3) and keep the décor minimal—perhaps a single large mirror (Idea 6) above the console to bounce light. The key is consistency: stick to a limited color palette (e.g., charcoal, ivory, and a pop of teal) to avoid visual chaos.
Maintenance Tips for Longevity
- Dust regularly: Use a microfiber cloth on shelves and panels; avoid abrasive cleaners on wood.
- Check cable connections: Every 6 months, verify that HDMI and power cords are secure.
- Re‑seal wood: Apply a fresh coat of polyurethane annually in high‑traffic homes.
- Update art: Rotate gallery pieces seasonally to keep the space fresh without extra cost.
By staying on top of these simple tasks, your TV wall will remain a centerpiece for years, not just a fleeting trend.
Related Inspiration
Looking for ways to complement your new TV wall? Explore fireplace decor ideas for living room to create a cozy hearth, or check out japandi living room design ideas for a minimalist, natural aesthetic. If you’re blending styles, transitional living room design ideas can bridge modern tech with classic comfort.
Final Verdict
Choosing the right TV wall decor ideas and designs isn’t about picking the flashiest option; it’s about balancing function, budget, and personal style. The seven solutions above cover a spectrum—from high‑tech LED backlighting to budget‑friendly paint stencils—so you can tailor the look to your space, timeline, and wallet. In my experience, the combination that delivers the highest impact is a floating console paired with subtle backlighting and a curated gallery. It hides clutter, enhances viewing, and adds personality without overwhelming the screen.
Take the time to measure, plan, and source quality pieces. A well‑designed TV wall becomes a backdrop that not only showcases your entertainment system but also tells a story about you and your home.
How far should the TV be from the wall décor?
Leave at least 2‑3 in. of clearance between the TV and any shelving or artwork to prevent visual crowding and allow for proper ventilation.
Can I install LED backlighting myself?
Yes. Most LED strips come with adhesive backing and simple plug‑in connections. For smart strips like Philips Hue, you’ll need a hub, but installation remains a weekend DIY project.
What is the best paint finish for a TV wall?
A low‑sheen matte (e.g., Benjamin Moore Aura Matte) reduces glare and hides minor imperfections, making it ideal for walls behind large screens.
How much does a full TV wall makeover typically cost?
Costs vary widely. A budget-friendly makeover (paint, basic shelf, LED strip) can stay under $300, while a high‑end design with custom wood paneling and premium furniture can exceed $1,200.
2 réflexions au sujet de “How to TV Wall Decor Ideas And Designs (Expert Tips)”