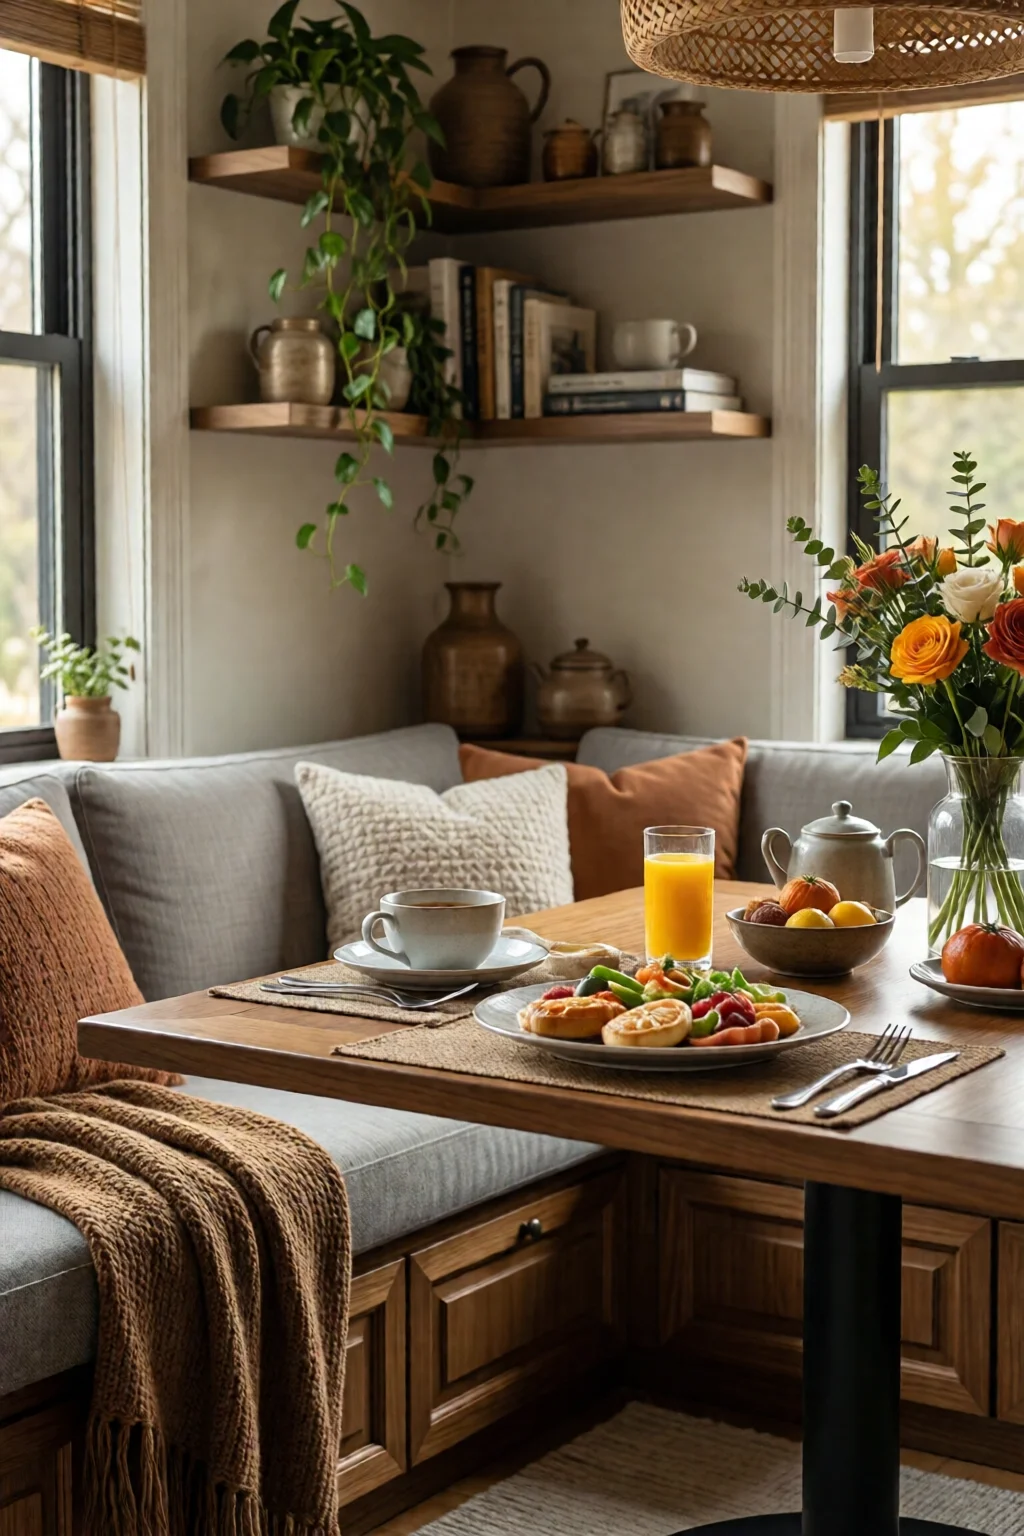
Imagine it’s a crisp Saturday morning, the sun is spilling through a modest kitchen window, and you’re sipping coffee at a snug little corner that feels like a private retreat. That’s the magic of a well‑designed breakfast nook – especially when it’s tucked into a cozy corner of a modest‑sized kitchen. In this guide you’ll learn exactly how to turn an under‑used angle into a functional, stylish nook that invites lingering over pancakes, quick work‑from‑home lunches, or a quiet moment with a book.
In This Article

What You Will Need (or Before You Start)
- Measuring tape – accuracy within ½ inch matters for built‑ins.
- Level and stud finder – to ensure cabinets sit straight and wall anchors hit studs.
- Basic tools – cordless drill, 1‑in. screwdriver set, utility knife.
- Seating – a bench (e.g., IKEA MARIUS, $149, 18″ deep × 48″ wide) or two stackable chairs (West Elm “Mid‑Century Slip‑through Chair”, $129 each).
- Table – round or oval to fit the corner; Pottery Barn “Briarwood Round Table”, 30″ diameter, $349.
- Lighting – pendant or wall‑sconce; Home Depot’s “Globe Electric 1‑Light Brushed Nickel Pendant”, $79.
- Storage solutions – floating shelves, built‑in cabinets, or a storage ottoman (IKEA “KIVIK” ottoman, $199).
- Finishing touches – cushions (e.g., Target “Threshold” 100% cotton, $24), rug (Ruggable “Cozy Corner” 5 × 7 ft, $149), decorative plates.
- Paint or wallpaper – a light, reflective hue or a subtle pattern; Benjamin Moore “Pale Oak” (HC‑122) at $38 / gal.
Having these items on hand before you start will keep the project under the 2‑week timeline I usually see for a DIY corner nook, and will help you stay within a typical budget of $1,200‑$1,800 for a full makeover.
Step 1: Assess Space and Layout
Begin by measuring the corner’s floor footprint. A comfortable nook needs at least 36″ of width from wall to wall and 24″ of depth for a bench. Use a stud finder to locate vertical studs within 16‑in. intervals – you’ll anchor any built‑in or heavy shelf to these for safety.
Sketch a simple floor plan on graph paper (1‑square = 1 in.). Mark the location of existing appliances, windows, and doors. In my experience, the best corner is opposite the stove, where natural light can be maximized without interfering with cooking traffic.
Decide whether the nook will be a “fixed” installation (built‑in bench and cabinets) or a “flexible” setup (free‑standing bench and table). Fixed solutions can increase resale value by up to 3 % according to a 2023 Zillow analysis, but they require more carpentry skill.
Step 2: Choose Seating
Comfort is king. A bench that runs the length of the wall creates a seamless look, while individual chairs allow for easier rearrangement. If you opt for a bench, select a model with a seat depth of 15‑18″ and a back height of 14‑16″ for ergonomic support.
For a budget‑friendly DIY, repurpose an old dresser drawer as a bench seat. Sand, paint in “Pale Oak”, and add a 2‑in. foam cushion covered with a washable slipcover – total cost under $80.
Don’t forget to consider the cushion fabric’s durability. I’ve found 300‑thread‑count cotton blends hold up best in high‑traffic kitchen areas.
Step 3: Pick a Table
The table should complement the bench’s length without crowding the circulation path (minimum 36″ clearance to the nearest countertop). A 30″‑diameter round table fits most 8‑ft × 10‑ft kitchens, while an oval 36″ × 24″ table works for larger corners.
If you love a rustic vibe, choose a reclaimed wood table from Rustic Revival (price $425, thickness 1.5″). For a modern touch, the IKEA LISABO glass‑top table (22 × 22 in., $49) pairs beautifully with a dark‑stained bench.
Attach felt pads to the table legs to protect flooring – a small $12 set from Slip‑Proof does the trick.
Step 4: Lighting and Ambiance
Good lighting turns a corner nook from “just another space” into a cozy haven. A pendant light centered over the table provides task lighting, while wall‑sconces add ambient glow.
For a sleek look, install the kitchen lighting ideas modern and bright pendant at 30″ height – this is the optimal distance for a 30″ table. Pair it with a dimmer switch (Leviton DW15S‑1BZ, $24) so you can dial down to 40 % for evening meals.
If the corner has a window, consider sheer curtains (e.g., IKEA “VIVAN” at $29) to diffuse morning light without blocking the view.
Step 5: Add Storage and Decor
Built‑in cabinets beneath the bench are a game‑changer. Install two 12″‑deep, 24″‑wide cabinets with soft‑close hinges (Hafele, $45 each) for dishes, mugs, or pantry items. The top of the bench can double as a pull‑out shelf for a small indoor plant.
Floating shelves above the nook add visual interest and extra storage for cookbooks. I like the open shelving kitchen ideas styling style – 24″ × 6″ pine shelves at $32 each, anchored to studs.
Finish with a rug that defines the space. A 5 × 7 ft “Cozy Corner” rug from Ruggable (as mentioned earlier) costs $149 and is machine‑washable, a practical choice for a high‑traffic area.
Common Mistakes to Avoid
- Overcrowding the corner – leaving less than 30″ clearance makes the space feel cramped and can violate local building codes for egress.
- Choosing the wrong lighting height – pendant lights hung too low (< 24″) glare into eyes; too high (> 36″) reduces task lighting efficiency.
- Neglecting moisture protection – kitchen corners are prone to splashes; seal the bench’s underside with a clear water‑based polyurethane ($15 per quart).
- Skipping a power outlet plan – forgetting to install a GFCI outlet near the nook means you can’t plug in a toaster or phone charger without unsightly extension cords.
- Using non‑weather‑rated hardware – stainless steel or brass fasteners resist kitchen humidity better than cheap zinc.
Troubleshooting or Tips for Best Results
Issue: Bench wobbles after installation. Re‑check that all brackets are anchored to studs. If you only hit drywall, add toggle bolts (4 × 1/8″) rated for 50 lb each.
Tip: Maximize storage in a small nook. Install pull‑out drawers inside the bench (IKEA “SKUBB” organizers, $12 per set) to keep flatware organized without taking extra floor space.
Problem: Light is too harsh. Add a frosted glass diffuser (e.g., 12‑in. “Luna” diffuser, $22) to the pendant shade.
Advice: Keep the color palette light. Light walls (off‑white, pastel) reflect more natural light, making the nook appear larger. Pair with a darker accent wall behind the bench for depth – a navy “Naval” paint from Sherwin‑Williams at $42 / gal works beautifully.
Seasonal Update: Swap out cushion covers each season. In my own kitchen, a set of linen‑blend cushions in muted teal ($18) gives a fresh look without a full re‑paint.
Summary Conclusion
Transforming a neglected corner into a breakfast nook ideas cozy corner masterpiece is achievable with a clear plan, the right materials, and attention to detail. By measuring accurately, choosing comfortable seating, selecting a proportionate table, installing proper lighting, and adding smart storage, you’ll create a nook that feels both inviting and functional. Avoid common pitfalls like overcrowding and improper lighting height, and use the troubleshooting tips to keep the space looking fresh for years.
Whether you’re a DIY enthusiast on a $1,200 budget or a homeowner ready to invest $2,000 for premium finishes, the steps above give you a roadmap to a nook that becomes the heart of your kitchen.
How much space do I need for a comfortable corner breakfast nook?
A minimum of 36 inches of width and 24 inches of depth is recommended. This allows a bench or two chairs and a small table while maintaining at least 30 inches of clearance to surrounding countertops.
Can I install a built‑in bench myself?
Yes, if you have basic carpentry tools and can locate studs. Use 2×4 framing, plywood sheathing, and finish with paint or veneer. For safety, anchor all supports to studs with at least three 3‑inch lag screws.
What lighting style works best for a small nook?
A single pendant light centered over the table, mounted 30‑inches above the surface, works well. Pair it with a dimmer and consider a wall‑sconce for additional ambient lighting.
How can I keep the nook looking tidy with kids?
Incorporate storage benches with lift‑top lids or pull‑out drawers, and use washable rug and cushion fabrics. Adding a low, open shelf for toys or books can also keep clutter off the floor.
Is it worth adding a rug under the nook?
Absolutely. A rug defines the space, adds warmth, and protects flooring. Choose a low‑pile, machine‑washable rug like the Ruggable “Cozy Corner” (5 × 7 ft, $149) for durability.