When I first stepped into a friend’s loft with exposed timber beams and a soft, muted sky‑blue ceiling, I felt an instant lift. The room didn’t just feel bigger; it felt curated. That moment reminded me how a few thoughtful ceiling decor ideas—especially beams and paint—can transform a space from ordinary to unforgettable. Whether you’re working with a high‑ceiling Victorian home or a modest 8‑foot apartment, the right combination of beams and paint can add depth, drama, and a dash of personality without breaking the bank.
In This Article
- 1. Understanding the Basics: Why Beams and Paint Work Together
- 2. Selecting the Right Beam Style for Your Space
- 3. Painting the Ceiling: Color Theory, Finish, and Technique
- 4. Integrating Beams and Paint with the Rest of Your Home
- 5. DIY Timeline and Cost Estimate
- Pro Tips from Our Experience
- Frequently Asked Questions
- Conclusion: Your Next Step Toward a Stunning Ceiling
In this guide I’ll walk you through every step of the process: choosing the right beam style, picking a paint color that works with your overall palette, budgeting for materials, and executing a flawless finish. You’ll get actionable checklists, cost breakdowns, and real‑world tips I’ve gathered from over a decade of interior design projects. Let’s get your ceiling looking as good as the floors and walls below.
1. Understanding the Basics: Why Beams and Paint Work Together
1.1 Visual Impact of Horizontal Lines
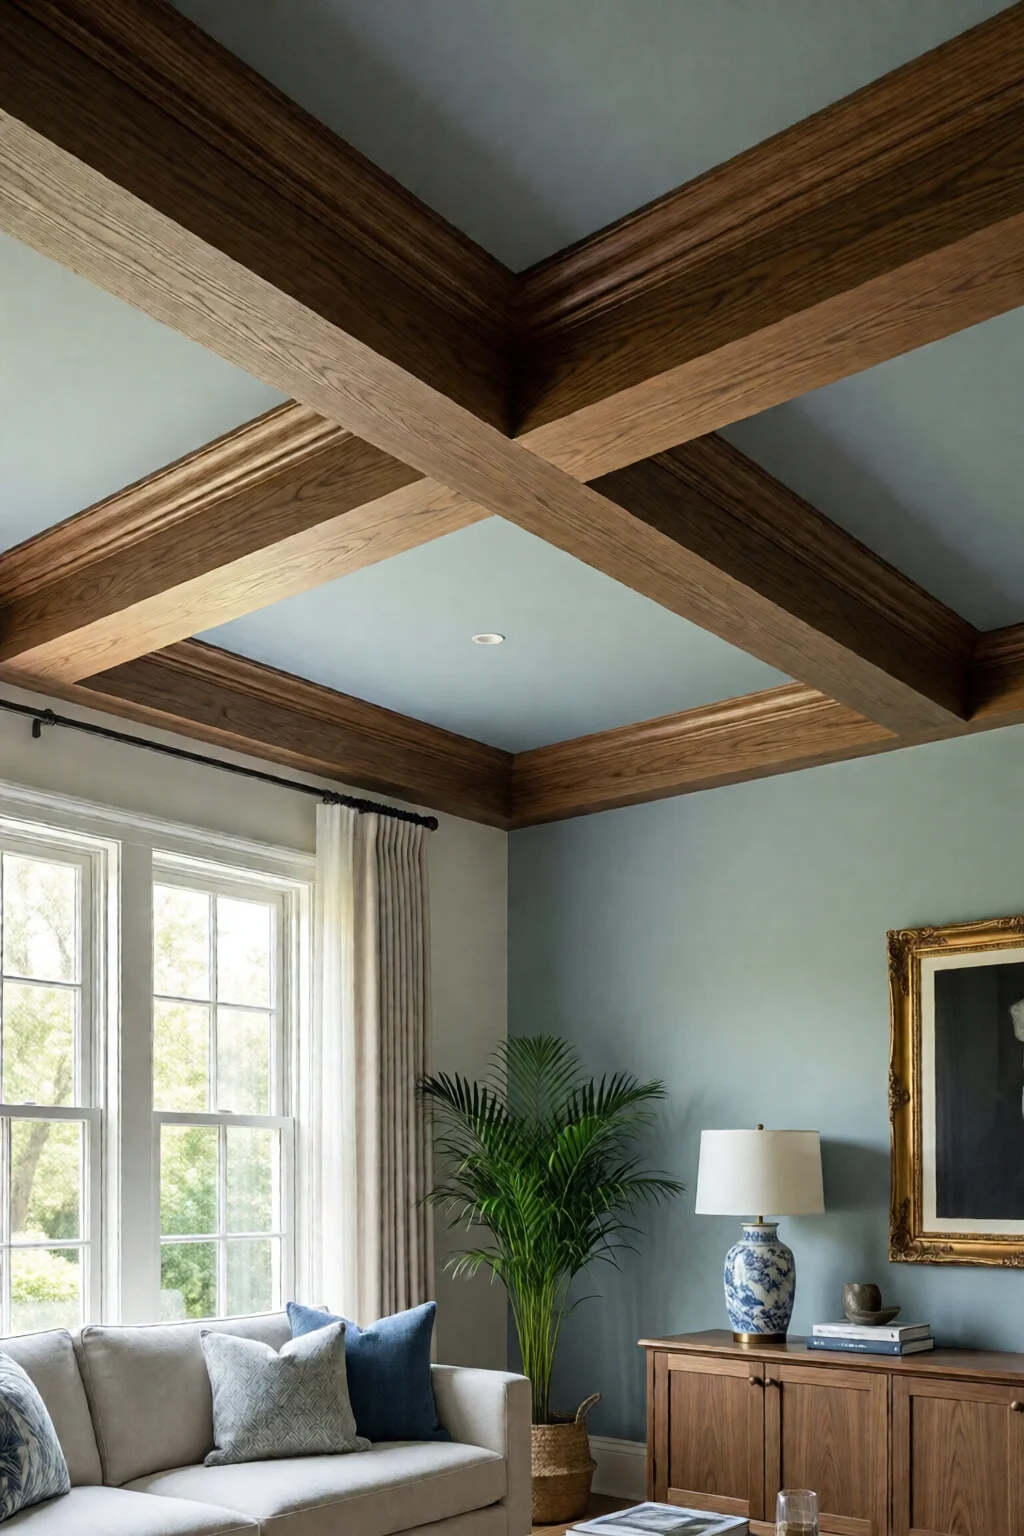
Beams create a built‑in visual anchor that can either elongate a room or break up a high ceiling. Paired with a well‑chosen paint shade, they become a design statement rather than a structural afterthought. In my experience, a ceiling painted a shade 2–3 tones lighter than the walls makes beams pop without overwhelming the eye.
1.2 Functional Benefits
Beyond aesthetics, beams can hide wiring, ductwork, or slight imperfections in the plaster. A fresh coat of paint also protects the surface from moisture and dust, extending the life of both the beams and the ceiling plaster.
1.3 Budget Considerations
Real wood beams cost anywhere from $15–$45 per linear foot, while high‑quality faux wood alternatives (like Ekena Millwork’s Reclaimed Look Beams) run $8–$20 per foot. Paint is a relatively low‑cost variable: a gallon of premium interior paint from Benjamin Moore Aura costs about $65 and covers roughly 400 sq ft. A typical 12 × 12 ft room (144 sq ft) will need less than half a gallon for one coat and about a gallon for two coats.
2. Selecting the Right Beam Style for Your Space
2.1 Real Wood vs. Reclaimed vs. Faux
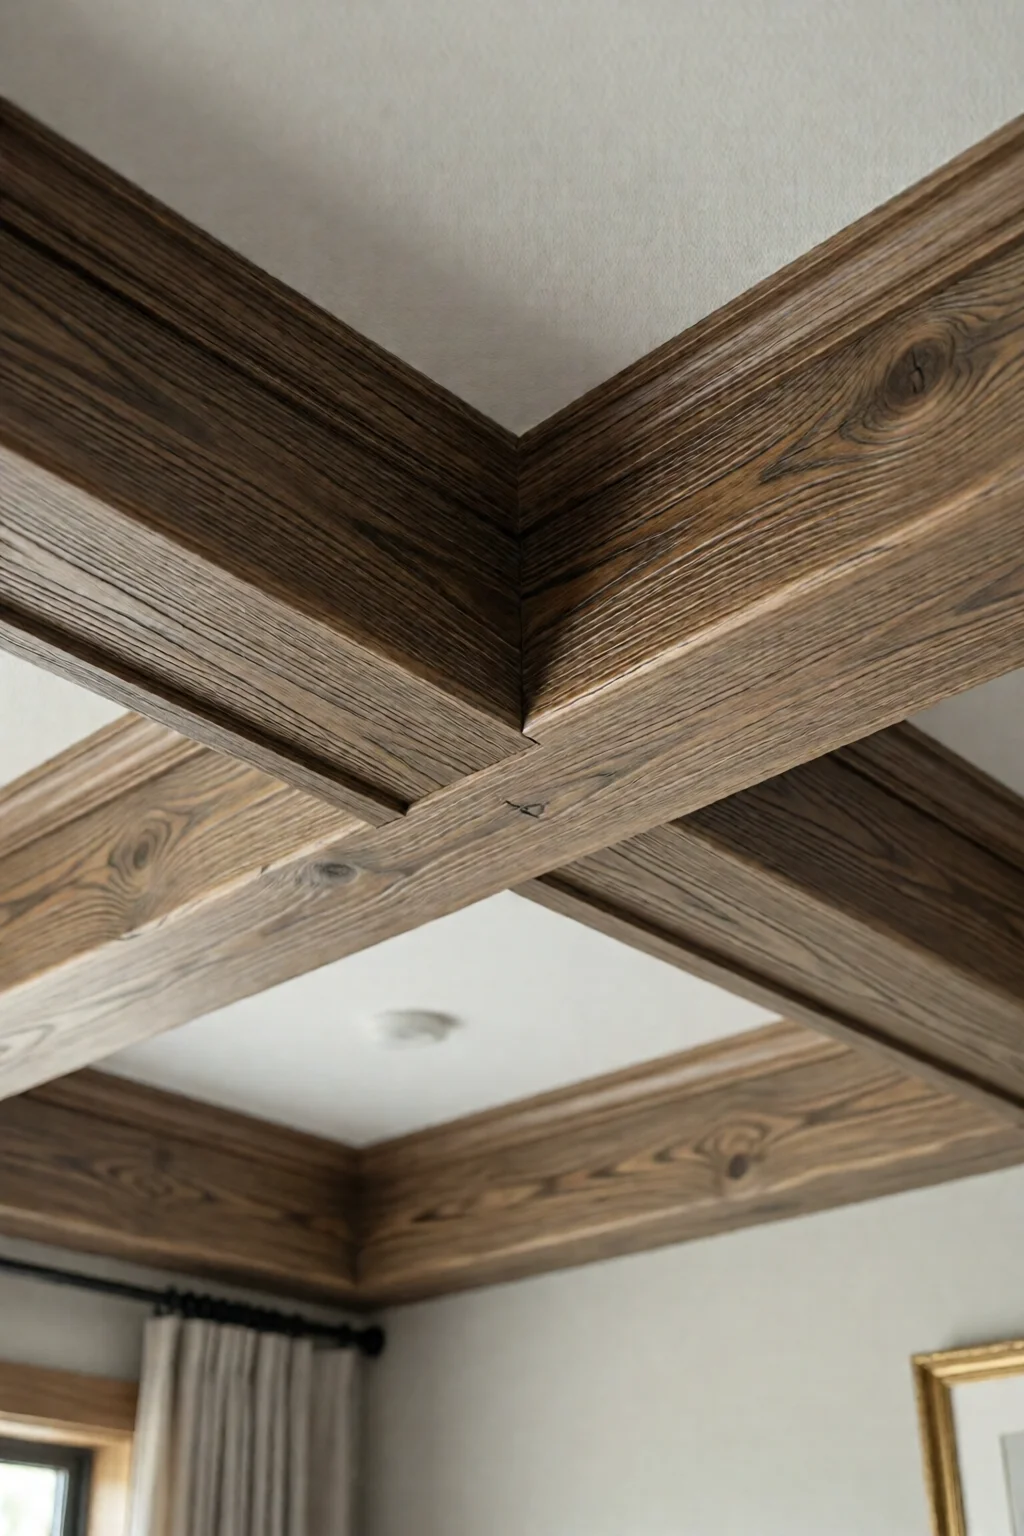
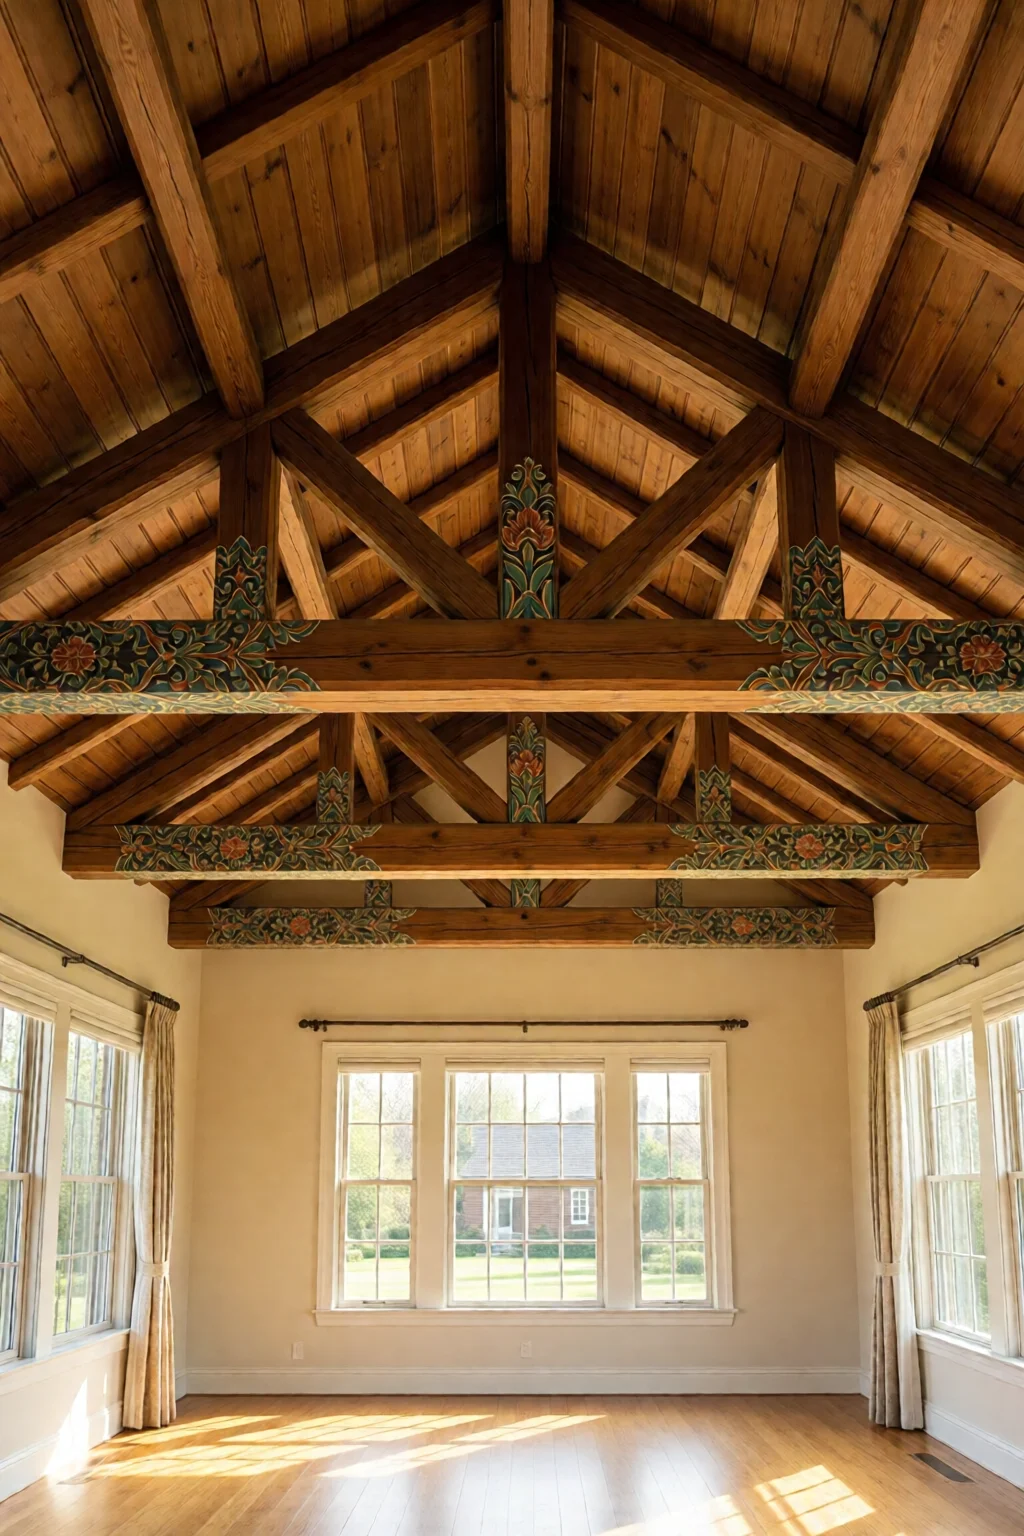
Real solid wood beams (e.g., Douglas fir) bring authentic texture but can be pricey—$30–$45 per linear foot for kiln‑dried, straight‑grain pieces. Reclaimed beams (salvaged from barns or factories) add history; expect $25–$35 per foot, plus a premium for cleaning and treatment. Faux beams made of compressed wood composite or PVC mimic the look for $8–$20 per foot and are lighter, making DIY installation easier.
2.2 Size and Span
Standard residential beams are 3½”× 5½” (nominal 4× 6). For a 12‑ft span, you’ll need about 12 ft of beam per ridge line. If you’re adding a decorative “bean‑pole” beam every 4 ft, calculate total length accordingly: 12 ft ÷ 4 ft = 3 sections × 12 ft = 36 ft of material.
2.3 Installation Difficulty
Real wood requires secure anchoring to joists, often with joist hangers (average $2 each). Faux beams can be nailed directly to plaster or attached with 3M Command Strips for a non‑permanent solution. If you’re not comfortable with structural work, stick to faux or lightweight reclaimed options.
| Beam Type | Cost per Linear Foot | Installation Difficulty | Durability |
|---|---|---|---|
| Solid Douglas Fir | $30–$45 | Moderate (requires joist hangers) | 30+ years (treated) |
| Reclaimed Barn Wood | $25–$35 | Moderate (cleaning & sealing) | 25+ years (depends on source) |
| Faux Wood Composite | $8–$20 | Easy (nail or adhesive) | 10–15 years (UV‑stable) |
| Metal Beam (Steel) | $15–$30 | Hard (requires drilling) | 30+ years (rust‑treated) |
3. Painting the Ceiling: Color Theory, Finish, and Technique
3.1 Choosing the Right Shade
For a ceiling that accentuates beams, consider these three strategies:
- Monochrome Harmony: Paint the ceiling a shade 2–3 tones lighter than the walls. Example: walls in Benjamin Moore “Revere Pewter” (HC‑172), ceiling in “White Dove” (OC‑17).
- Contrast Pop: Darken the ceiling (e.g., deep navy “Hale Navy” (HC‑154)) to make light‑colored beams stand out dramatically.
- Warm Accent: Use a muted terracotta or soft sage that pulls color from furniture or flooring, creating a cohesive look.
3.2 Finish Matters
Flat or matte finishes hide imperfections but can be harder to clean. For high‑traffic areas, a low‑sheen (e.g., Behr Premium Plus Ultra Eggshell, $32 per gallon) offers a balance of durability and subtle depth. In bathrooms or kitchens, opt for a satin or semi‑gloss for moisture resistance.
33>Application Tips for a Flawless Look
- Prep the Surface: Fill cracks with 3M Patch Plus Primer, sand smooth, and wipe with a tack cloth.
- Prime the Beams: Even if you’re painting the ceiling a different color, priming beams with KILZ Premium Primer (≈$22 per gallon) ensures even coverage.
- Roll, Then Brush: Use a ½‑in. nap roller for the flat surface, then a angled brush (2‑in.) for the beam edges to avoid lap lines.
- Maintain a Wet Edge: Work in 10‑ft sections, keeping a wet edge to prevent brush marks.
- Dry Time: Most interior paints dry to touch in 1–2 hours; wait 24 hours before hanging heavy décor.
Pro tip: Add a small amount (≈1 tsp) of gloss medium to matte paint for a subtle sheen that catches light without looking glossy.
4. Integrating Beams and Paint with the Rest of Your Home
4.1 Coordinating with Wall Colors
Reference our wall paint color trends for rooms article for up‑to‑date palettes. If your living room walls are a warm greige, a ceiling painted in a cool, pale blue will provide a soothing contrast while the beams stay in a natural honey tone.
4.2 Matching Floor and Furniture
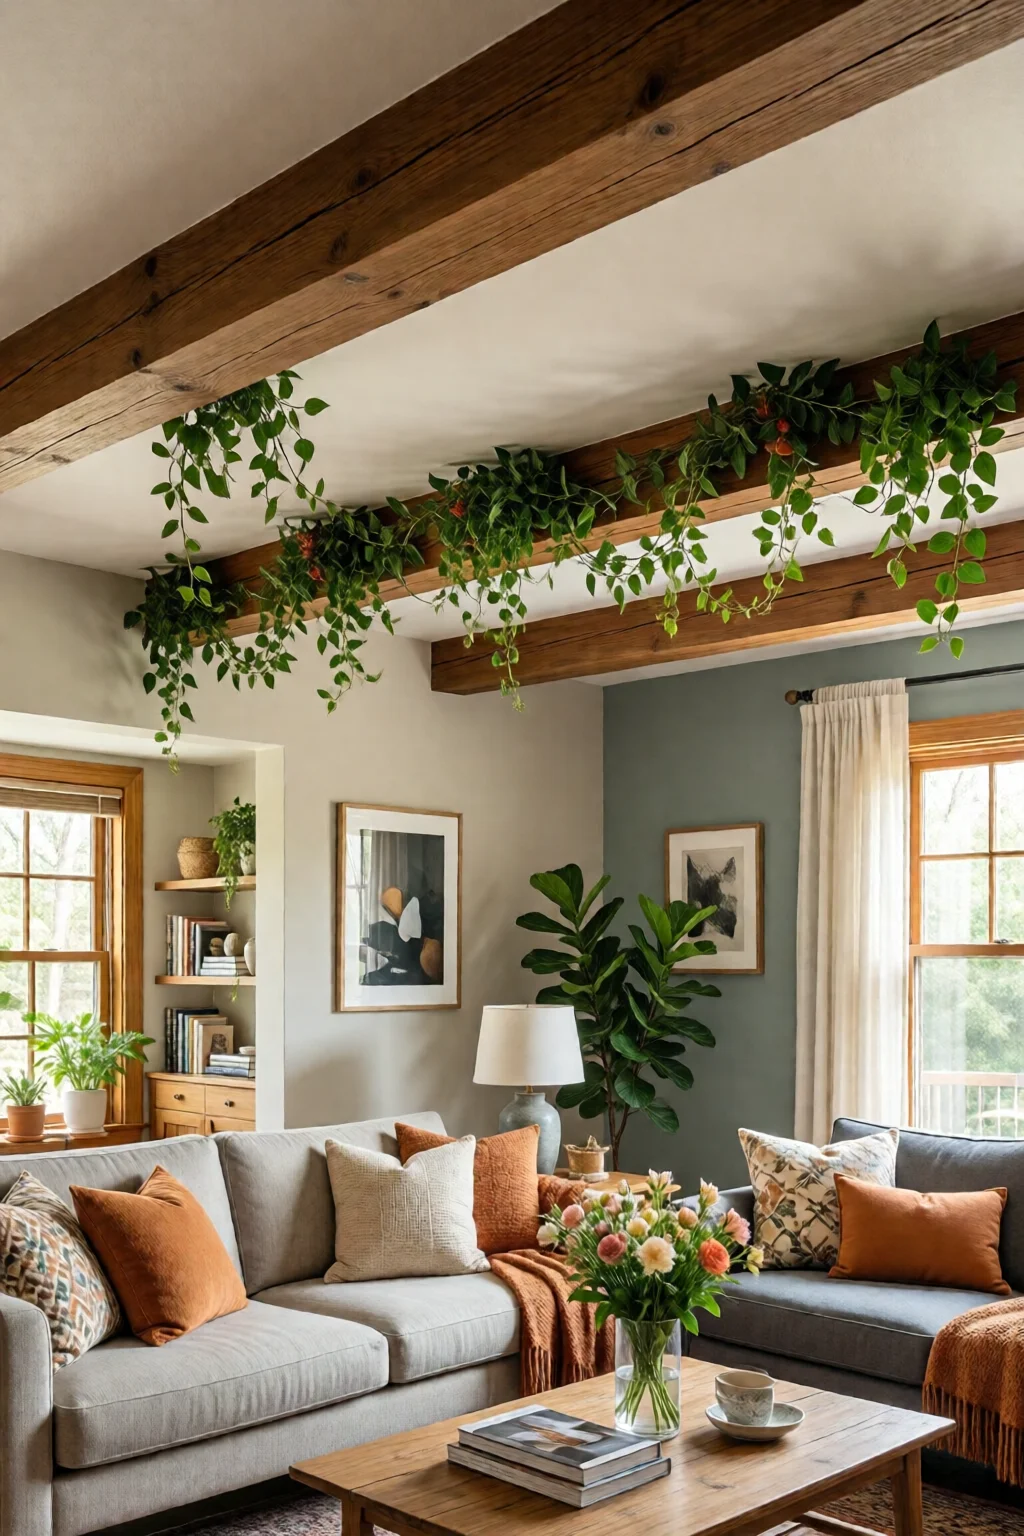
When you have hardwood floors, choose beams that echo the same species or finish (e.g., a walnut floor paired with walnut‑stained beams). For carpeted rooms, lighter beams and a neutral ceiling help keep the space feeling airy.
4.3 Adding Lighting
Recessed LED strips (≈$45 per 4‑ft strip) installed just below the beam line create a “cove” effect, highlighting the beam profile and adding ambient glow. For a rustic vibe, hang vintage pendant lights from the beams—just ensure the load rating is adequate.
5. DIY Timeline and Cost Estimate
5.1 Sample Project: 12 × 12 ft Living Room
| Task | Materials Cost | Labor (DIY Hours) | Total Time |
|---|---|---|---|
| Faux wood beams (3 × 6 ft each, 3 pieces) | $180 (3 × $60) | 4 hrs (cut & install) | 4 hrs |
| Primer (KILZ, 1 gal) | $22 | 1 hr | 1 hr |
| Paint (Benjamin Moore Aura, 1 gal) | $65 | 3 hrs (roll & brush) | 3 hrs |
| Recessed LED strips (2 × 4 ft) | $90 | 2 hrs (wire & mount) | 2 hrs |
| Total | $357 | 10 hrs | 10 hrs |
5.2 Cost‑Saving Alternatives
- Use paintable MDF beam kits from Home Depot ($12 per foot) for a budget under $150.
- Borrow a paint sprayer from a local hardware store to reduce roller time and achieve a smoother finish.
- Recycle old wooden pallets—sand, stain, and cut them into beam lengths for a rustic, <$50 project.
Pro Tips from Our Experience
- Test Paint Samples at Ceiling Height: Light shifts dramatically 8–10 ft up. Tape a 4‑inch square on the wall, paint, and observe at eye level before committing.
- Use a Chalk Line for Beam Placement: Mark a straight line on the ceiling where each beam will sit. This ensures perfect alignment, especially in rooms with multiple beams.
- Seal Reclaimed Wood: Even if the wood looks aged, apply a clear polyurethane (≈$30 per quart) to protect against moisture and insect damage.
- Combine Textures: Pair matte ceiling paint with beams that have a slightly glossy finish. The contrast adds depth without extra décor.
- Plan for Future Changes: If you anticipate repainting, choose beams that can be sanded and refinished rather than pre‑finished veneers.
Frequently Asked Questions
Can I install beams on a plaster ceiling without removing it?
Yes. Light‑weight faux wood or MDF beams can be adhered directly to plaster using construction adhesive (e.g., Loctite Power Grab). For heavier wood, locate joists with a stud finder and secure the beams with lag bolts or joist hangers.
How many coats of paint do I need on a ceiling with beams?
Two coats are recommended: one for coverage and one for even color. If you’re painting light-colored beams on a dark ceiling, a third coat on the beams may be necessary for full opacity.
Is it okay to paint over reclaimed barn wood?
Absolutely. First, clean the wood with a mild detergent, sand any rough spots, apply a high‑quality primer, then paint or stain as desired. This preserves the character while ensuring durability.
What’s the best lighting to highlight ceiling beams?
Recessed LED strips placed just below the beam line create a subtle “cove” effect. For a dramatic look, install directional spotlights aimed at the beams or use pendant lights that hang from them.
Conclusion: Your Next Step Toward a Stunning Ceiling
Ceiling decor ideas that combine beams and paint are a win‑win: you get architectural interest and a fresh color backdrop without a full remodel. Start by measuring your space, choose a beam style that fits your budget, pick a complementary paint shade, and follow the prep‑and‑paint process outlined above. Within a weekend and under $400, you can turn an empty sky into a design feature that ties the whole room together.
Ready to dive in? Grab a tape measure, your favorite paint, and a set of faux beams, and give your ceiling the makeover it’s been begging for. Happy decorating!